No Tools
Repair

Instructions

Easy to follow product instructions for your metal and plastic no tools required kit installation, compression style hose repair

Instructions

No Tools Hose Repair

Easy to follow product instructions for your metal and plastic no tools required kit installation, compression style hose repair

Instructions

No Tools Hose Repair

Easy to follow product instructions for your metal and plastic no tools required kit installation, compression style hose repair

Congratulations on your purchase of a Ray Padula no tools hose repair kit! Follow these instructions to properly install your repair. These instructions apply to the hose, male, and female thread repairs (RP-RIHR-P, RP-RIHR-D, RP-RIFR-P, RP-RIFR-D, RP-RIMR-P, and RP-RIMR-D), pictured below.

Note: Depending on where you purchased your repair kit, the "RP-" prefix may be substituted.

Installing a Hose Repair Kit

Use a hose repair kit to mend a burst or damage located in the middle of your garden hose.

RIHR-P and RIHR-D can be used to repair any brand 5/8 - 3/4 in. (1.59 - 1.90 cm.) diameter garden hose.

For instructions on installing a thread repair kit, continue reading below.

Open Your Repair Kit

Open Your Repair Kit

Open Your Repair Kit

Carefully remove your hose repair kit from its packaging.

1. Remove all product packaging, and secure all individual product parts.

2. When fully disassembled, your metal or plastic hose repair kit will include (2) thread collars and (1) hose repair coupling.

Carefully remove your hose repair kit from its packaging.

1. Remove all product packaging, and secure all individual product parts.

2. When fully disassembled, your metal or plastic hose repair kit will include (2) thread collars and (1) hose repair coupling.

Carefully remove your hose repair kit from its packaging.

1. Remove all product packaging, and secure all individual product parts.

2. When fully disassembled, your metal or plastic hose repair kit will include (2) thread collars and (1) hose repair coupling.

Installation

Installation

Installation

Step 1
Cut away Hose Damage

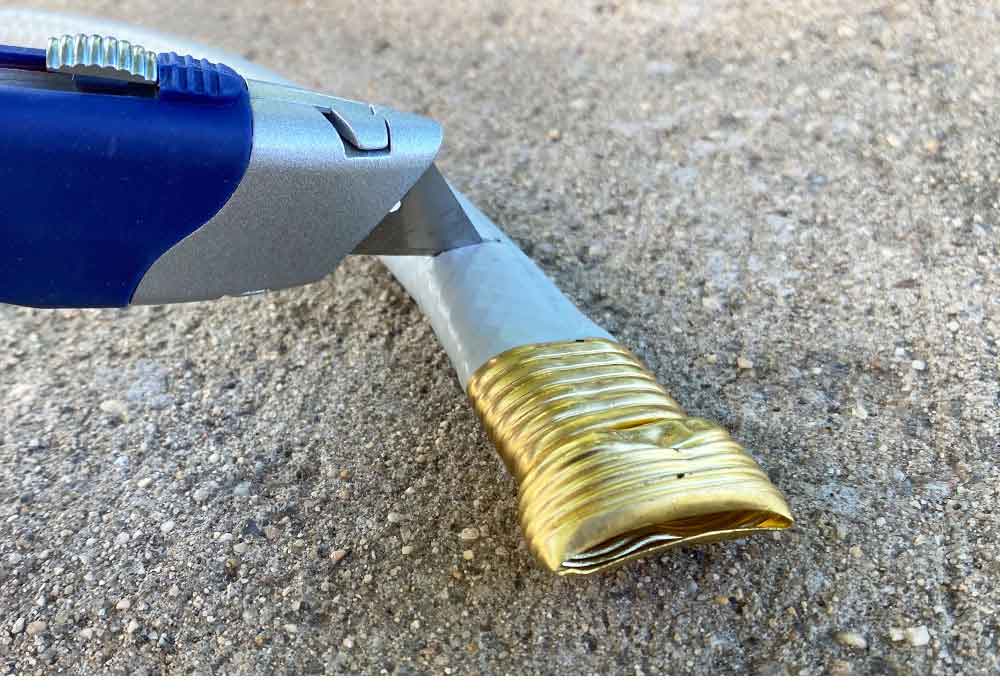
Using a utility knife, or pipe / hose cutter, carefully cut off the damaged section of the hose.

Be sure have two clean edges on either side of the hose.

Step 2
Insert Hose Repair

Slide collars over each side of the hose.

Insert the hose repair coupling into one side of the garden hose.

Once inserted, attach the other side of the hose.

Helpful Hint! Warming your hose in the sun prior to installation will allow for easier coupling attachment.

Step 3
Secure Collars

Slide collars up the hose, and securely attach by threading clockwise, until completely tightened.

Congratulations!

Your garden hose is repaired.

Installing a Thread Repair Kit

Use a thread repair kit to mend broken or crushed male or female threads.

RIFR-P and RIFR-D can be used to repair female threads on any brand 5/8 - 3/4 in. (1.59 - 1.90 cm.) diameter garden hose.

RIMR-P and RIMR-D can be used to repair male threads on any brand 5/8 - 3/4 in. (1.59 - 1.90 cm.) diameter garden hose.

Open Your Repair Kit

Open Your Repair Kit

Open Your Repair Kit

Carefully remove your hose thread repair kit from its packaging.

1. Remove all product packaging, and secure all individual product parts.

2. When fully disassembled, your metal or plastic hose thread repair kit will include (1) threaded collar and (1) thread repair insert.

Carefully remove your hose thread repair kit from its packaging.

1. Remove all product packaging, and secure all individual product parts.

2. When fully disassembled, your metal or plastic hose thread repair kit will include (1) threaded collar and (1) thread repair insert.

Carefully remove your hose thread repair kit from its packaging.

1. Remove all product packaging, and secure all individual product parts.

2. When fully disassembled, your metal or plastic hose thread repair kit will include (1) threaded collar and (1) thread repair insert.

Installation

Installation

Installation

Step 1
Cut off Damaged Threads

Using a utility knife or pipe/hose cutter, carefully cut off the damaged threads.

Step 2
Insert New Thread Coupling

Slide collar over the end of the hose.

Insert the thread repair coupling into the garden hose.

Helpful Hint! Warming your hose in the sun prior to installation will allow for easier coupling attachment.

Step 3
Secure Collar

Slide collar up the hose, and securely attach by threading clockwise, until completely tightened.

NOTE: If installing female threads, make sure the coupling swivels freely before attaching collars.

Congratulations!

Your garden hose threads are repaired!

Other Repair Instructions

Other Repair Instructions

Other Repair Instructions

We're Here to Help

Let's Eliminate the Guesswork

Ray's Favorites

Explore Ray's favorite items, and some of our most popular solutions for your yard

Find the perfect product for your exact yard.

Right here. Right now.