A rock garden is as creative and unique an endeavor as any vegetable or flower garden. There are many ways to cultivate these gardens, perfect for arid regions, to suit your gardening personality. Here, we'll explore a couple of common ways to design your own.
Types of Arid Rock Gardens
Course
These are longer stretches of low-lying rock levels with plants interspersed
Mounding
These are stacks of different levels of rocks, creating a small mound with plants in purposeful crevices.
Within these two styles, there are also categories of natural or synthetic gardens. Natural rock gardens use a piece of landscape that was already there. Synthetic involves you creating and assembling your own.
Materials Needed:
-
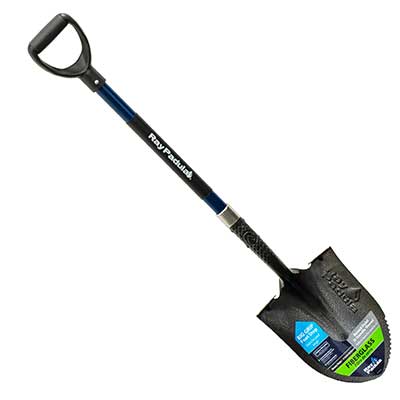
Shovel
-
Wheelbarrow
-
Stones & rocks
-
Landscape Fabric
-
Soil
-
Plants
-
Landscape Edging (optional)
Planting a rock garden in the course style is straightforward, fill in the area with the stones of your choice and plant it as you would a typical landscaped area. People often use edging and different colors of rock to make designs out of their course-style rock gardens. The plants tend to only be accent points in layouts such as these. Helpful Tip! It's recommended to lay down landscape fabric prior to laying the stones and rocks to prevent unwanted weeds from growing through the stones.
Step 1: Create the Foundation
Begin by clearing away the grass and weeds from the area you intend to build on. It limits the amount of weeding that will need to be done later. Next, cover the area with landscape fabric, using garden fabric staples to hold the fabric in place. This will prevent weed growth later on. Then, lay down your first level of stone, usually medium sized rocks that set-up the foundation. Fill the center with soil that has plenty of sand to create the needed drainage.
Step 2: Build Upwards
Lay down the second level of stones inside of the larger shape of the foundation. These should be lighter than those in the bottom layer, so they are easier to experiment with and fit in properly. There should be enough room between the edges of the layers for plants to be set and planted inside.
Helpful Tip: These stones in the second layer and upward are the most noticeable to the eye. Use better-looking stones in these middle layers.

Step 3: Choose Appropriate Plants
Rock gardens are suited to arid regions because they primarily use plants that like hot, dry weather and well-draining soil. Choose plants that fit these categories. Some excellent examples include: Ice Plant (Delosperma cooperi), Dragon's Blood Stonecrop Sedum spurium, Hens and Chicks Sempervivum tectorum, Creeping Thyme Thymus serpyllum, and Coreopsis Coreopsis verticillata.
Step 4: Top It All Off
If you notice, we have not yet finished the top of the mound. To do so, place the plants in their pots to get an idea of what it will look like once completed. Once satisfied, plant them in their spots. Then, to finish off the top layer, add soil where needed and intersperse smaller rocks, stones, or pebbles over the top and sides of the mound. It should give the impression that the plants are growing out from the rocks.
Helpful Tip: Use the Rule of Threes when designing your rock garden. Use three plants of a kind to make the design look complete.
Legal Disclosure:
This post is provided for informational, educational purposes only. This information is intended to provide general guidelines. Because tools, products, materials, techniques, and local codes are constantly changing, Ray Padula Holdings assumes no responsibility for the accuracy of the information contained herein and disclaims any liability for the omissions, errors, or outcomes of any projects or tasks completed. It is the responsibility of the reader to ensure compliance with all local laws, rules, codes, and regulations for any projects completed. If there are any questions or doubts regarding any elements of any information provided, consult a local, licensed professional.


